

-
10 Tips for Plaster and Stucco Repair: Ensure Proper Drainage, Apply Flashing Correctly, and More!
-
6. Apply the Base Coat at the Right Thickness for Durability
-
8. Implement Moist Curing to Prevent Cracks in the Base Coat
-
10. Prepare the Finish Coat with Attention to Texture and Color
Repairing plasters doesn’t have to be a daunting task. Whether it’s hairline cracks or larger damages, plasters and material, we’ve got you covered with the top 10 tips for achieving seamless repairs. From essential preparation steps to expert techniques, this listicle is your go-to guide for restoring the beauty of your walls and selecting the right material.
In this comprehensive listicle, we’ll walk you through everything from identifying common issues to choosing the right materials, including plasters, and executing flawless repairs. We’ll also delve into insider tricks involving material and plasters that can make a significant difference in the outcome of your project. So, if you’re ready to elevate your repair game and give your walls a new lease on life with plasters, scroll down for a treasure trove of valuable insights!
1. Assess and Repair the Framing
Before diving into plaster repair, it’s crucial to conduct a thorough assessment of the framing. Look for any signs of structural damage such as rot, deterioration, or plasters. If you spot damaged or rotten framing materials or plasters, don’t hesitate to replace them. This step is vital in ensuring a solid foundation for your plaster repair work.
Reinforcing weak areas is equally important. By reinforcing these spots, you can prevent future issues and guarantee that your plaster or stucco job stands the test of time. Taking care at this stage will lay the groundwork for great plaster results in your repair project.
Remember, starting with a sturdy foundation sets the tone for an excellent finish on your plaster or stucco job.
2. Ensure Proper Drainage to Prevent Water Damage
To safeguard stucco plaster from water-related issues, it’s crucial to install effective drainage systems. Redirecting water away from the stucco plaster prevents dampness and potential damage. Clogged gutters and downspouts, if not cleared regularly, can lead to water accumulation.
Proper grading of the surrounding landscape away from the stucco walls and plaster is a preventive measure against moisture infiltration. By ensuring that the ground slopes away from the walls, it minimizes the risk of wet weather causing water to seep into the stucco plaster.
In regions with frequent showers or high humidity, plaster measures are even more critical in preventing molds and other problems associated with excess moisture. The right approach to managing drainage not only protects against immediate damage but also helps maintain the structural integrity of your property over time.
3. Apply Flashing Correctly to Avoid Leaks
To prevent water infiltration, it’s crucial to install flashing and plaster around windows, doors, and other openings. Proper overlap and sealing of flashing materials, including plaster, are essential in ensuring a watertight barrier against leaks. Using corrosion-resistant flashing materials and plaster is vital for long-lasting protection.
Improper installation or inadequate sealing of flashing and plaster can lead to costly water damage within the structure. According to industry data, up to 90% of all building leaks are attributed to improper installation of flashings and plaster around openings. This highlights the critical role that correctly applied flashing plays in preventing leaks and maintaining structural integrity.
Corrosion-resistant materials such as stainless steel or copper provide durable protection against moisture intrusion over an extended period. For instance, stainless steel flashings offer exceptional resistance to rust and corrosion in various environmental conditions, making them a reliable choice for long-term waterproofing.
4. Use the Correct Furring Techniques for a Stable Base with enough cement, flat surface, tiles, and plasters.
To ensure a stable base for stucco application, it’s crucial to install furring strips that create an even surface. This step is essential for achieving a professional and long-lasting finish.
When choosing furring materials, consider the existing wall condition. For example, if dealing with masonry or concrete walls, pressure-treated wood or corrosion-resistant metal furring channels are suitable options. On the other hand, when working with wood-framed walls, galvanized nails or screws can be used to secure the furring strips.
Spacing the furring strips evenly is vital as it allows for consistent support across the entire stuccoed area. Typically, spacing them at 16 inches on center is recommended; however, this may vary depending on specific project requirements.
Securely attaching the furring strips to the wall ensures stability and longevity of the stucco finish. Utilizing appropriate fasteners such as concrete anchors or specialized screws designed for attachment to various substrates will help prevent any future issues related to instability.
5. Get enough material for strong adhesion when applying tiles, plasters, and damp areas.
To ensure strong adhesion when working on plaster and stucco repair, it’s crucial to follow the recommended sand-to-cement ratios. This ratio typically ranges from 2:1 to 3:1, meaning two or three parts sand to one part cement.
Adjusting the sand-to-cement ratio based on climate conditions is essential. In humid environments, using more cement can enhance adhesion due to its ability to resist moisture better than sand alone. Conversely, in drier climates, a higher proportion of sand might be suitable.
Thoroughly mixing the sand and cement is vital for achieving a consistent blend that will result in optimal adhesion strength. Uneven distribution of materials can lead to weak spots in the finished stucco or plaster work.
Apply the Base Coat at the Right Thickness for Durability and enough material.
To ensure a long-lasting plaster or stucco repair, it’s crucial to apply the base coat correctly. Aim for an even thickness of about 3/8 to 1/2 inch when applying the base coat. This thickness provides durability and stability to the repair.

Using a straightedge or screed board is essential in achieving uniformity in thickness across the entire surface. These tools help maintain consistency, preventing weak spots that could lead to future issues with the repair.
Avoid applying the base coat too thin, as this can compromise its strength and increase susceptibility to cracking. A thicker application creates a robust foundation for subsequent layers and enhances overall resilience against wear and tear.
7. Properly Prepare and Apply the Brown Coat
To ensure a successful plaster or stucco repair, it’s crucial to follow specific steps for preparing and applying the brown coat.
-
Dampening the base coat before applying the brown coat is essential as it enhances adhesion, allowing for a stronger bond between layers.
-
Mixing and applying the brown coat in small sections is vital to maintain its workability. This approach prevents premature drying, enabling better control over achieving a smooth finish.
-
Using a trowel or float during application is key to achieving a level surface. It helps evenly distribute the material while maintaining consistency throughout the repair process.
Applying these techniques not only ensures structural integrity but also contributes to an aesthetically pleasing result.
Implement enough cement and damp to prevent cracks in the base coat.
To prevent premature drying and cracking, it’s crucial to keep the base coat moist after application. This can be achieved by misting the surface regularly or covering it with a damp cloth. By doing so, moisture is retained within the base coat, allowing for proper curing and reducing the likelihood of cracks forming.
Moist curing should be continued for at least 48 hours post-application. This extended period ensures that the base coat remains sufficiently hydrated, promoting optimal curing conditions. It’s important to note that inadequate moisture during this critical phase can lead to structural weaknesses and compromise the overall integrity of the plaster or stucco.
9. Ensure the Leveling Coat is Smooth and Even
To achieve a flat surface, it’s crucial to apply the leveling coat uniformly. Use a long straightedge to inspect for any uneven areas on the layer of plaster or stucco. Feather out edges meticulously to seamlessly blend the leveling coat.
When applying the leveling coat, ensure that it is spread evenly across the entire surface. This step is essential in creating a smooth and flawless base for subsequent layers or tiles.
Rolling over the leveled surface with a plane roller can help in achieving an even texture throughout, ensuring that there are no high points or depressions left behind.
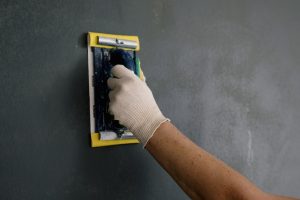
10. Prepare the Finish Coat with Attention to Texture, Color, Painting, Plasters, Sprayer and Enough Material.
When preparing the finish coat for plaster or stucco repair, it’s crucial to mix the material with texture additives that align with the desired finish. This can involve using sand or other aggregates to achieve a specific texture, such as smooth, swirled, or stippled.
Applying the finish coat evenly is essential for a professional-looking result. Techniques like troweling or texturing help ensure an even application and consistent texture throughout the surface. This step not only impacts aesthetics but also affects the durability of the repair.
Selecting appropriate color pigments is equally important in achieving a visually appealing end result. Uniformly applying these pigments ensures that there are no patches of uneven color on the repaired area. Proper attention to detail during this stage enhances not only visual appeal but also longevity.
For example, if repairing a stucco exterior wall, adding iron oxide pigments can provide long-lasting color retention despite weather exposure. This demonstrates how selecting suitable color pigments contributes to both immediate visual impact and long-term maintenance.
Summary
You’ve now learned the essential tips for plaster and stucco repair. From assessing and repairing the framing to ensuring proper drainage, applying flashing correctly, and getting the sand-to-cement ratio right, each step is crucial for a successful repair. Properly preparing and applying each coat is vital for durability and preventing cracks. Remember, attention to detail in texture and color for the finish coat will give your repair a professional touch.
Now it’s time to roll up your sleeves and put these tips into action. Don’t be afraid to get your hands dirty and take on that plaster or stucco repair project with confidence. With these tips in mind, you’ll be well-equipped to tackle the job effectively and ensure a long-lasting, high-quality result. Happy repairing!
Frequently Asked Questions
How important is it to assess and repair the framing before plaster and stucco repair?
Assessing and repairing the framing is crucial as it ensures a solid foundation for the plaster or stucco. It helps identify any structural issues that need addressing before applying the materials, preventing future problems.
What are some key considerations for ensuring proper drainage to prevent water damage during plaster repair?
Proper drainage is vital to avoid water damage. Ensure gutters are clear, downspouts direct water away from walls, and grading slopes away from the structure. This prevents water accumulation around the plaster or stucco, preserving its integrity.

Why is it essential to apply flashing correctly when working on plaster repair?
Applying flashing correctly is crucial as it prevents leaks by directing water away from vulnerable areas. Properly installed flashing acts as a barrier against moisture infiltration, safeguarding the structural integrity of your plaster or stucco work.
How does using the correct furring techniques contribute to a stable base for plaster repair?
Utilizing appropriate furring techniques creates a level surface for attaching lath or other support systems. This ensures an even application of the base coat, promoting stability in your plaster or stucco work while minimizing potential irregularities.
Why is getting the sand-to-cement ratio right important for strong adhesion in plaster repair?
The sand-to-cement ratio directly impacts adhesion strength. A proper mix provides optimal bonding between materials, enhancing durability. Achieving this balance results in a reliable foundation for subsequent layers of your plaster or stucco application.